Automatic Transcription
Desktop Call Recorder turns your recorded calls into readable text. Every conversation becomes skimmable — and it all happens locally on your computer, like everything else the recorder does: no cloud, no accounts, and your audio never leaves the machine.
How It Works
- Record a call as usual — no extra steps needed.
- Transcribe it: press Transcribe on the recording, or let it happen automatically (see below).
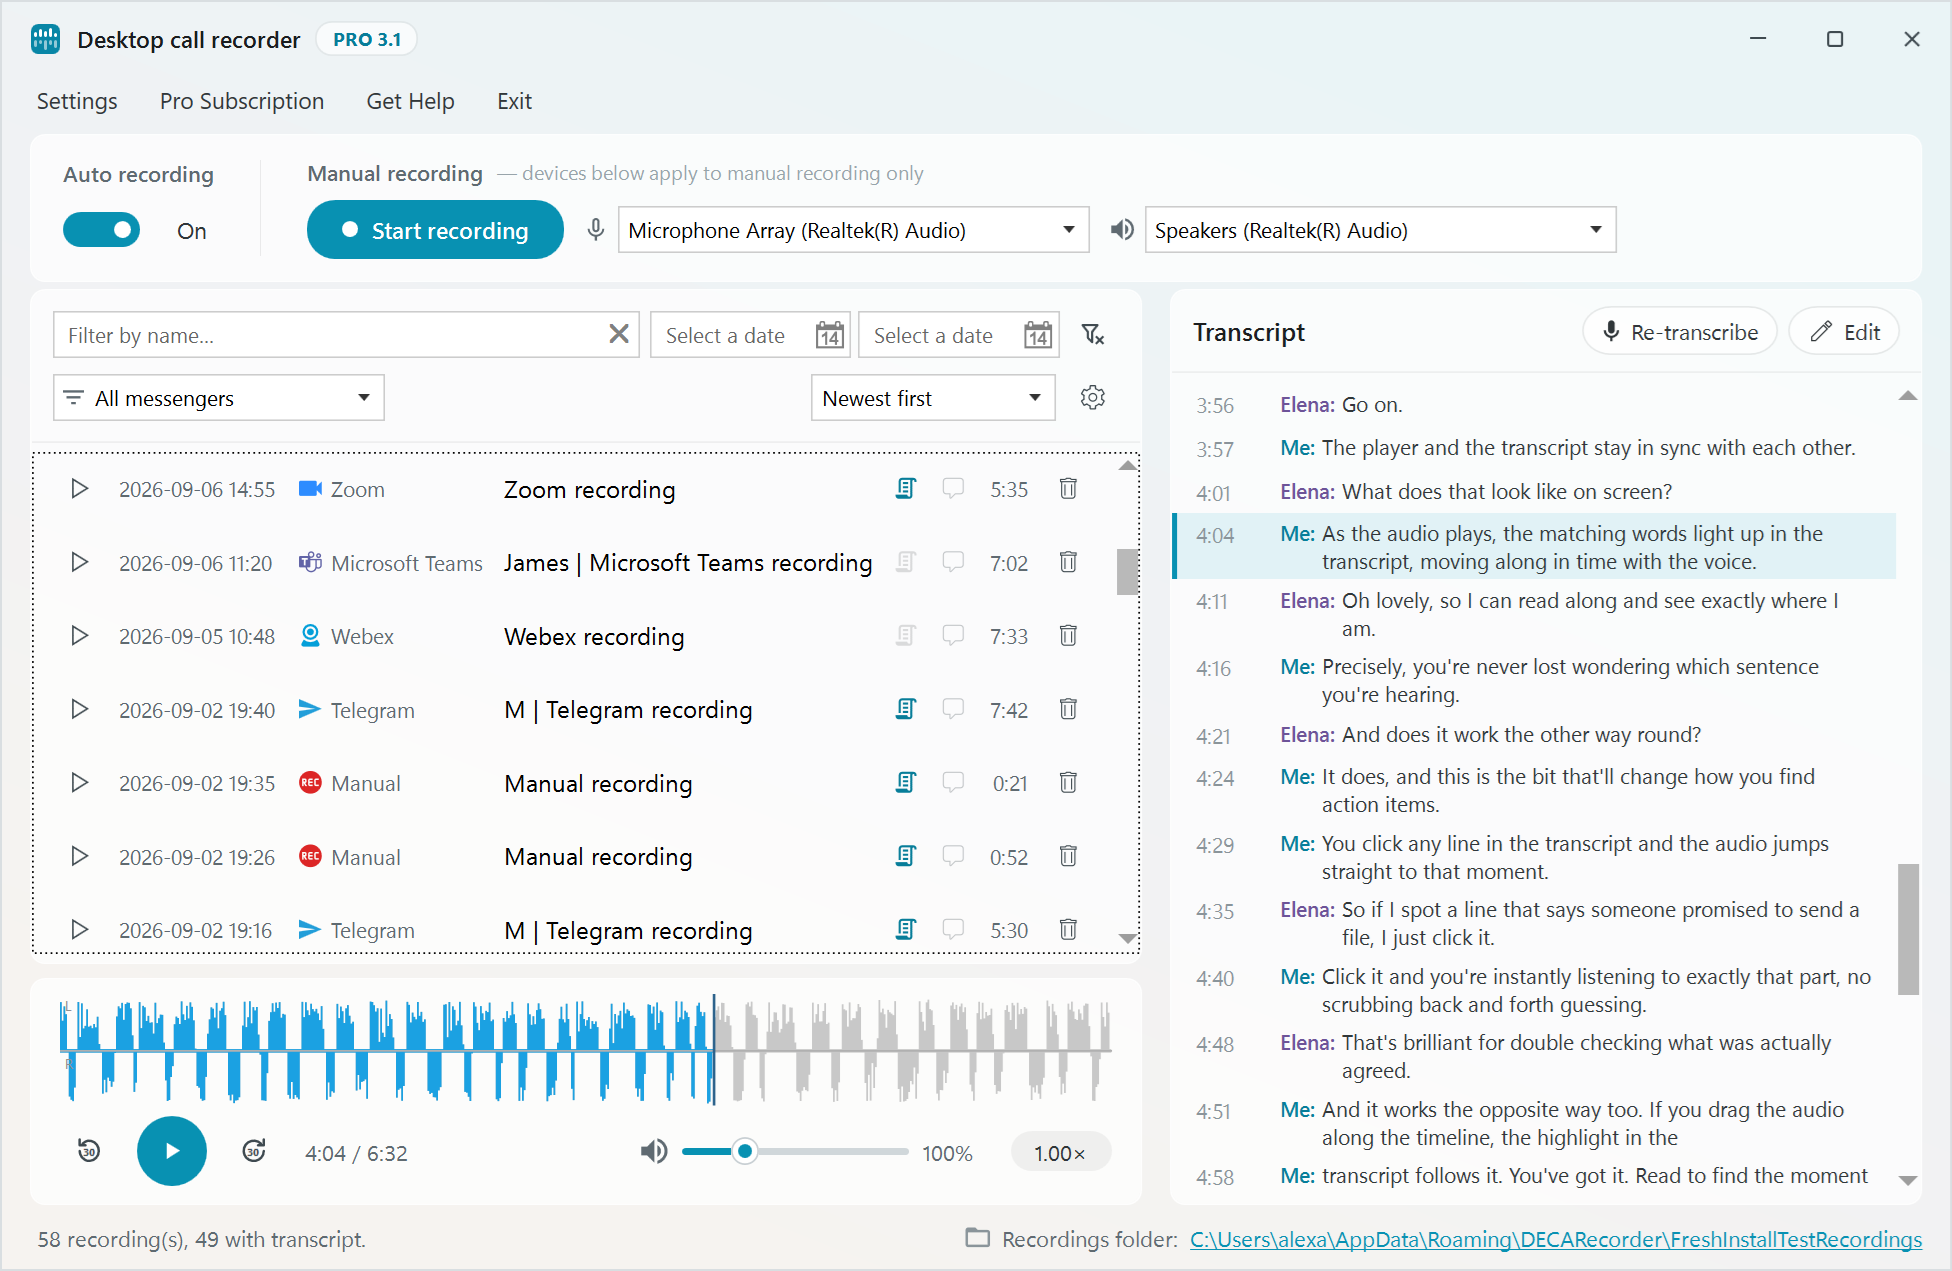
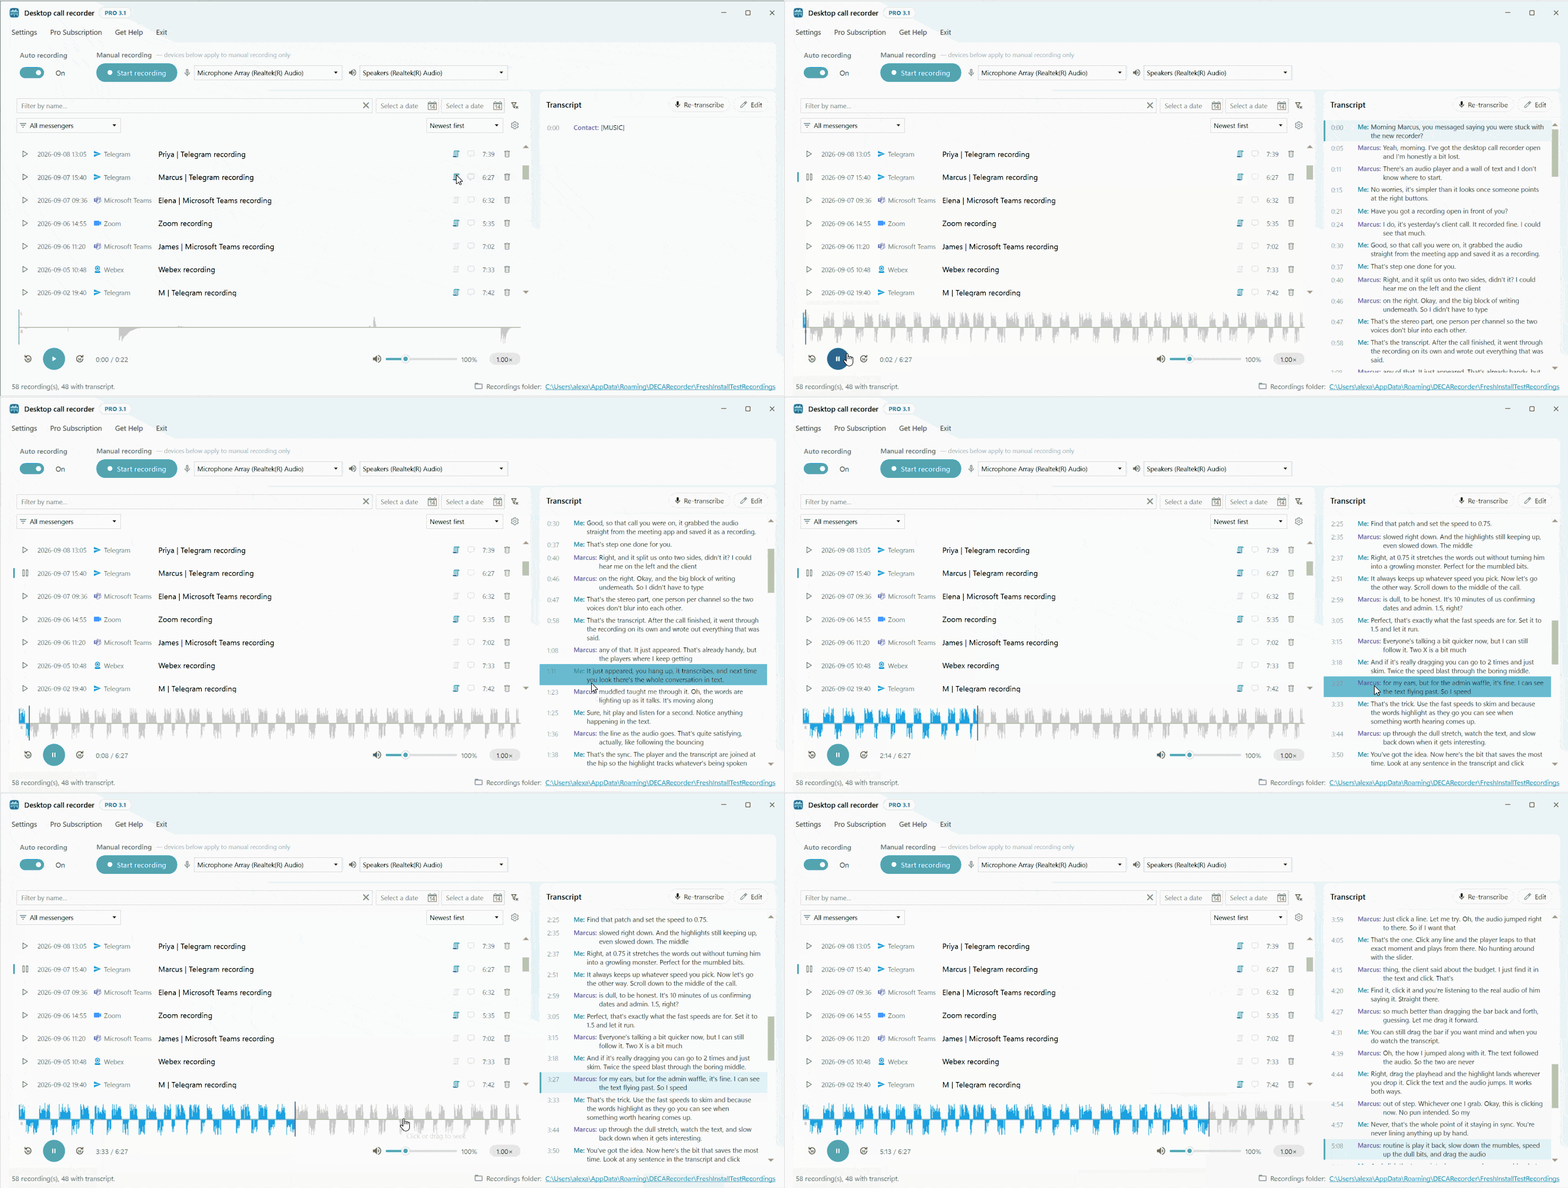
- Open the recording in the built-in player to read the transcript alongside the audio.
Automatic or Manual
Out of the box, transcription is manual: press Transcribe next to any recording and it is transcribed on the spot — one transcription runs at a time, with progress shown. If you want every new call transcribed for you, switch on “Transcribe new recordings automatically” in Settings → Transcription (it is off by default). It runs after each new recording finishes; existing recordings are never touched automatically — transcribe those manually whenever you need them.
Choosing an AI Model
Transcription quality and resource use depend on the AI model. Three models are available in Settings → Transcription:
| Model | Download | RAM while transcribing | Notes |
|---|---|---|---|
| base (default) | ~142 MB | ~500 MB | Good speed/accuracy balance |
| small | ~466 MB | ~1.2 GB | Noticeably better, still CPU-friendly |
| large-v3-turbo | ~1.6 GB | ~3.5 GB | Best accuracy, still fast on CPU |
Everything runs on your processor — no graphics card required.
Downloading a Model
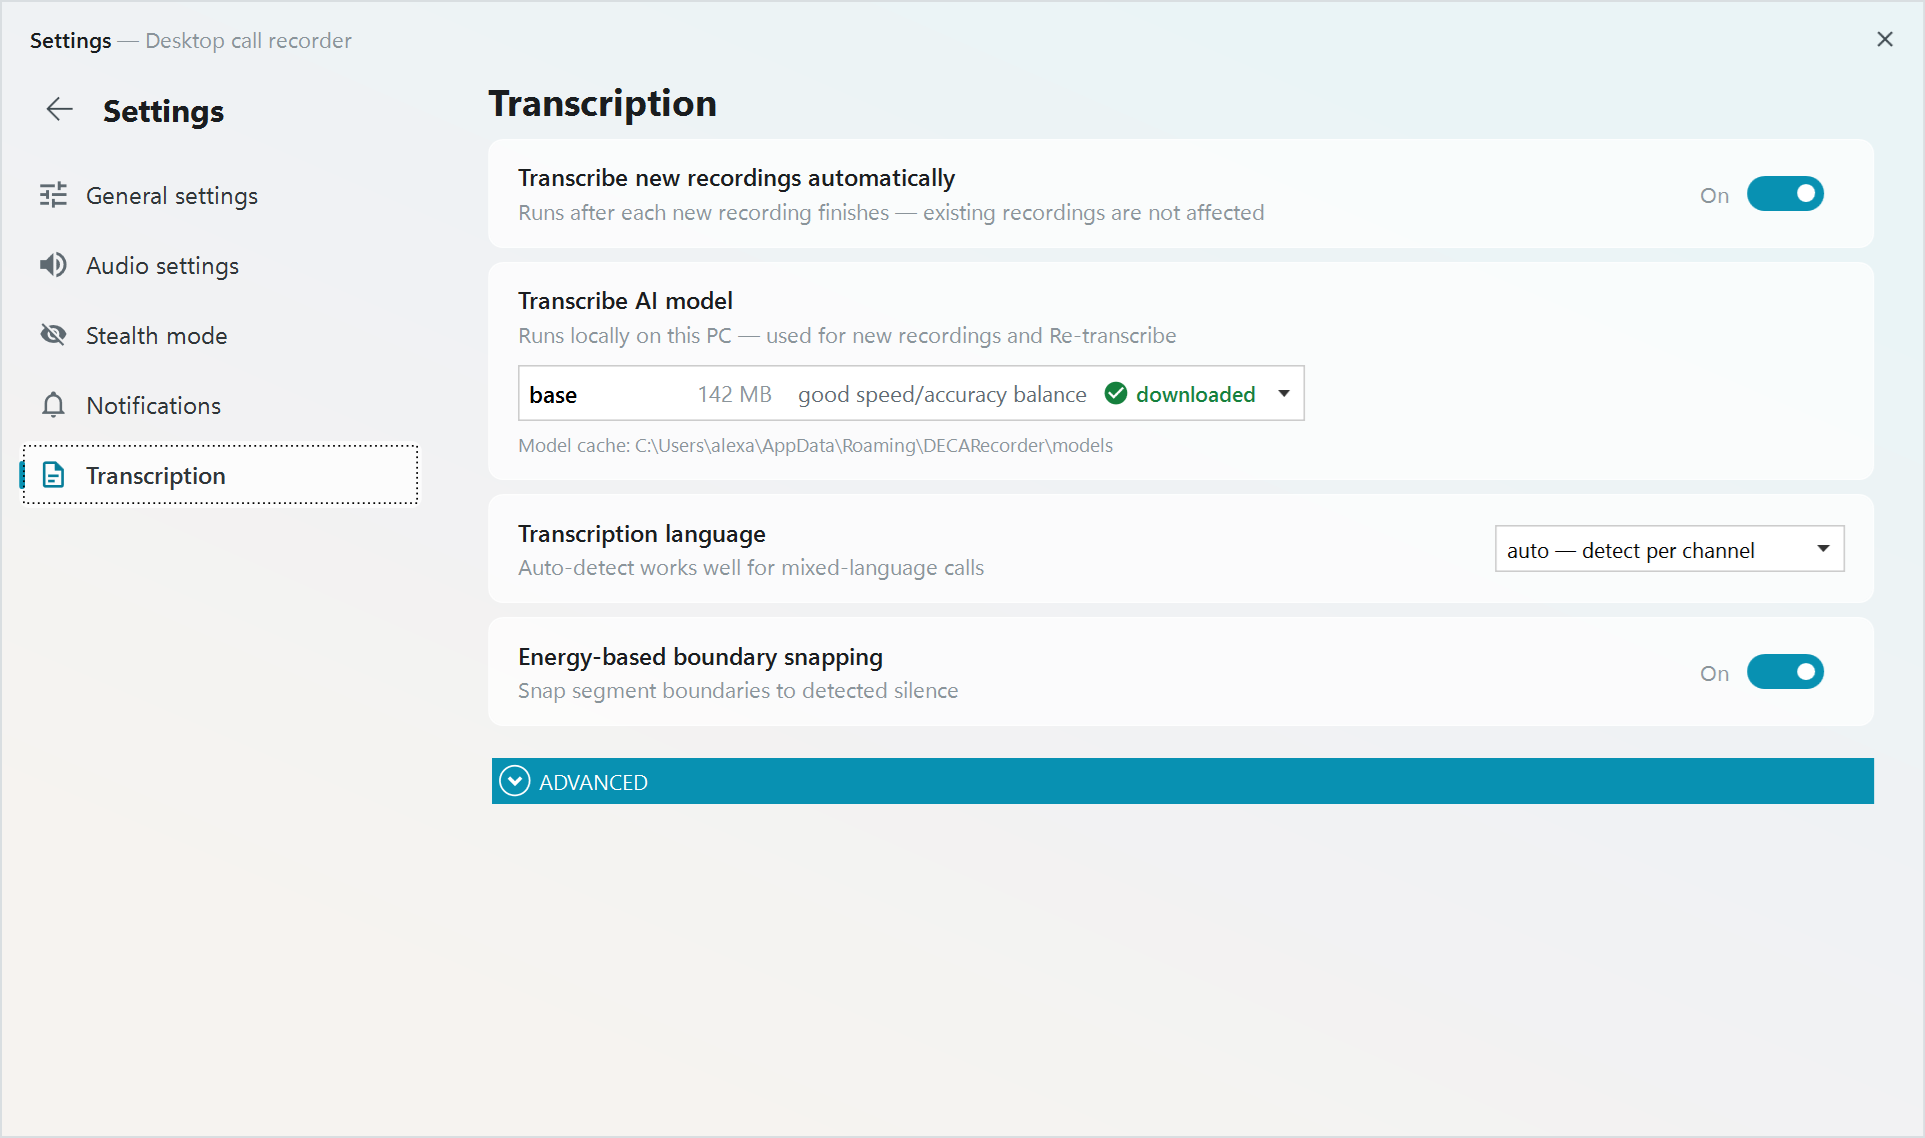
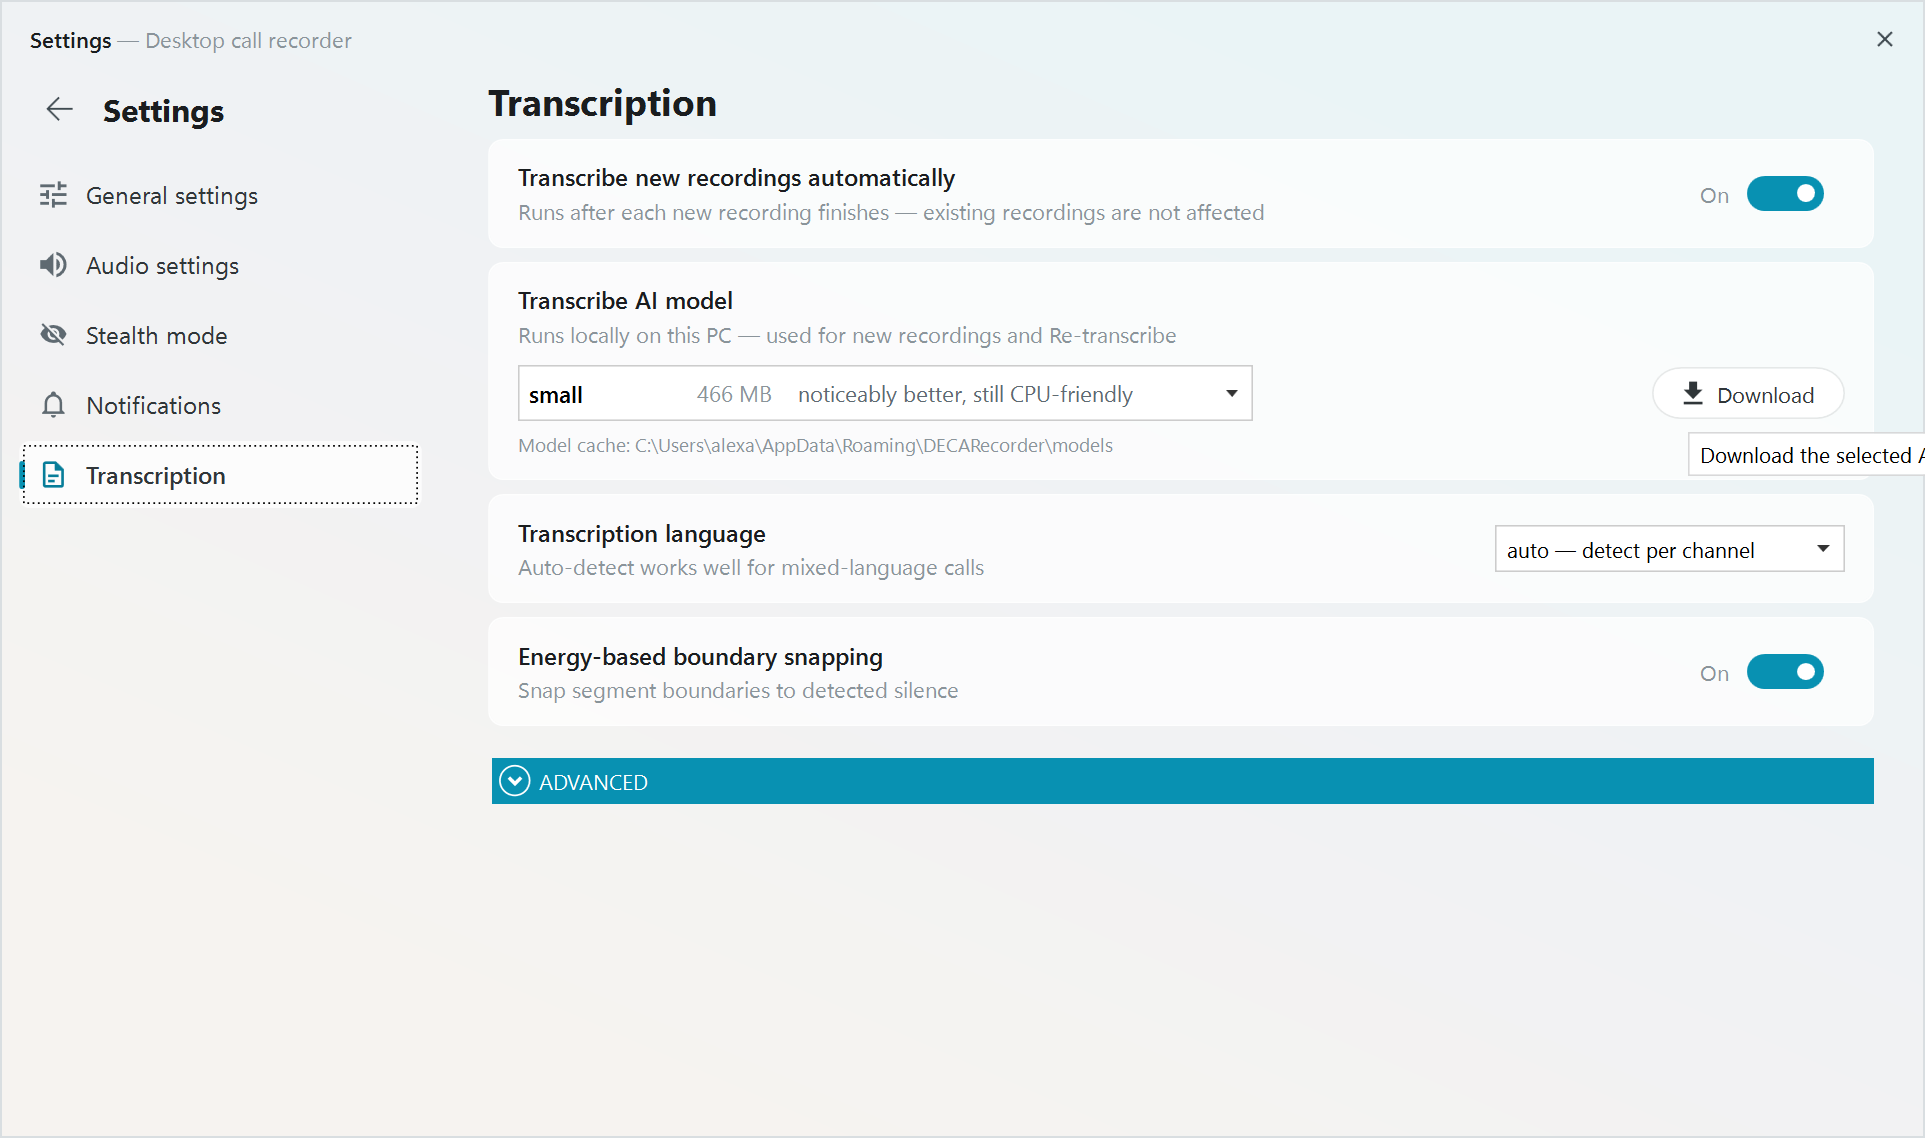
The base model downloads by itself in the background after installation. To use a bigger model, open Settings → Transcription, select the model and press its Download button — a “downloaded” badge appears when it is ready. If a model is likely to need more memory than your PC has, the app shows a RAM advisory. It is only a warning — the choice always stays yours.
Re-transcribe and Edit
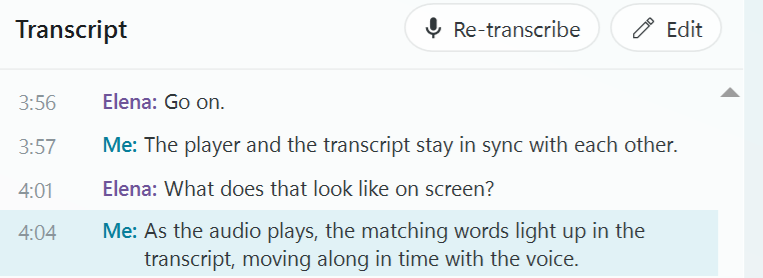
The transcript panel has two buttons for an existing transcript:
Re-transcribe runs the transcription again — useful after downloading a better model. It replaces the previous transcript; the speaker labels are kept.
Edit lets you correct the text line by line — fix a misheard name or term, then press Save.
Who Said What
Recordings keep the two sides of a call on separate stereo channels — you on the left, your contact on the right — so the transcript reliably tells both speakers apart and labels every line.
Read Along During Playback
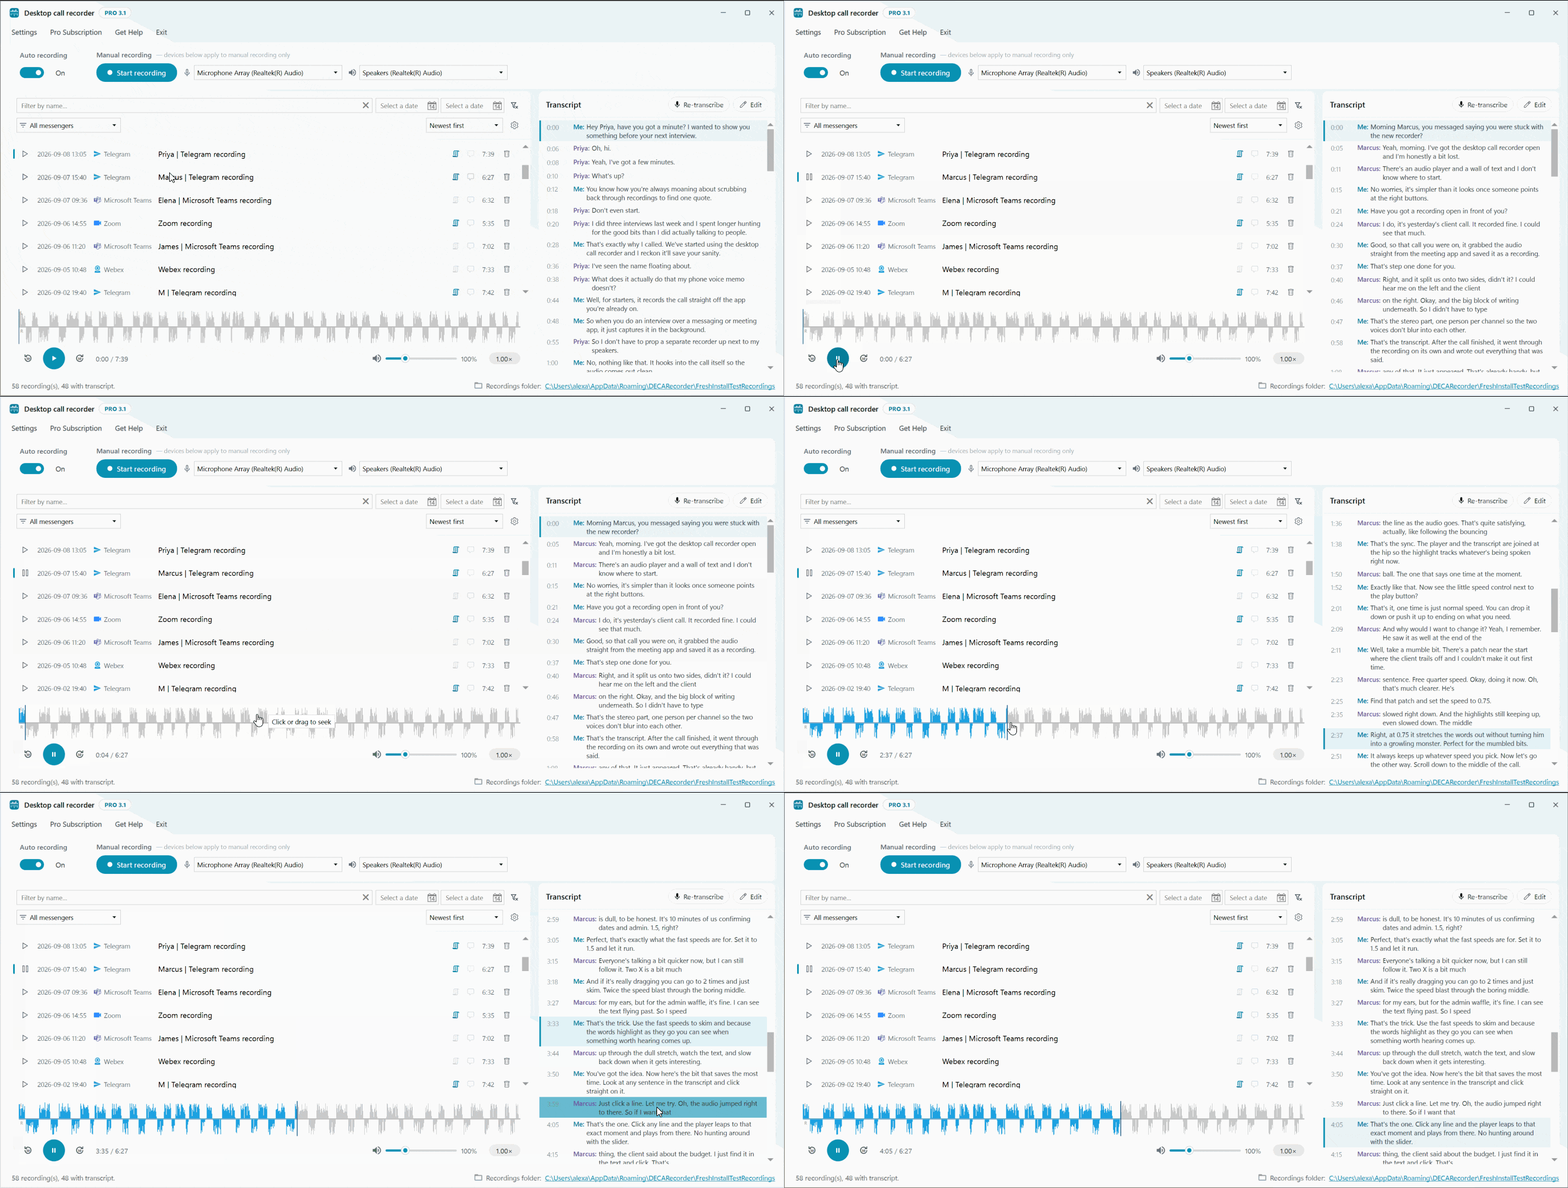
In the built-in player the transcript follows the audio: the current line is highlighted as it is spoken, and clicking any line jumps playback to that moment. See the player manual for details.
Where Transcripts Are Stored
Transcripts are saved right next to the recording as two plain files with the same name — a readable text file and a subtitle (.srt) file. They are created on your PC and stay there: your call audio is never sent to an external transcription service.
The free version transcribes the first 3 minutes of each call; Pro removes the limit.